本文的所有操作是建立在本地已经配置好Hadoop和java环境的基础上,若未完成,请去这个链接先学习好
loner:Hadoop 在mac本地的配置
本文参考博客
macOS:使用IntelliJ IDEA远程连接Hadoop
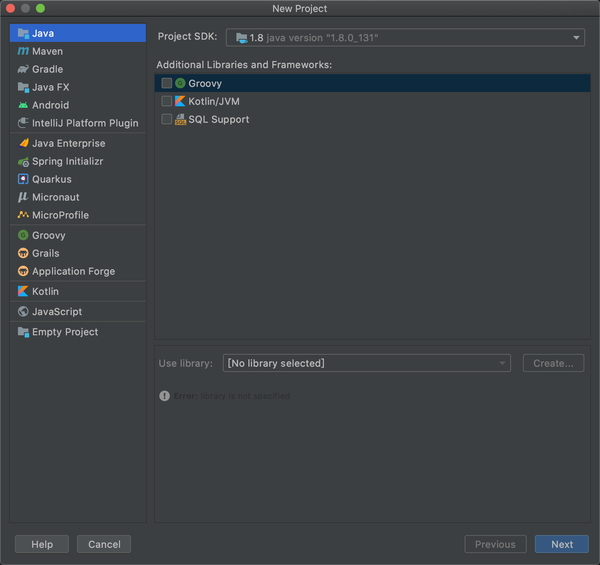
首先使用intelliJ IDEA 配置指定的jdk
这里操作其实只需要在java class 里面运行就可以了,命名进入
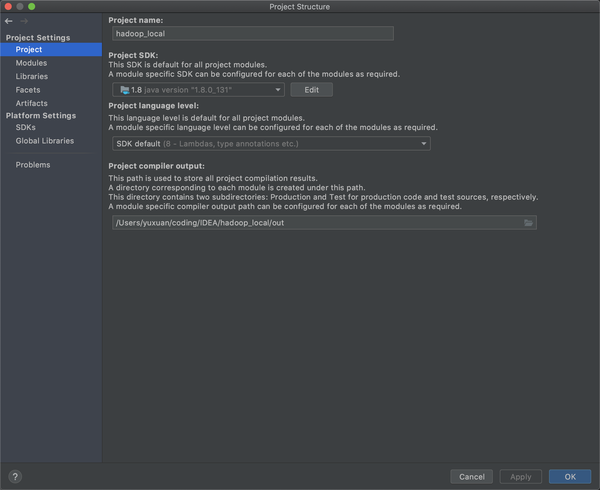
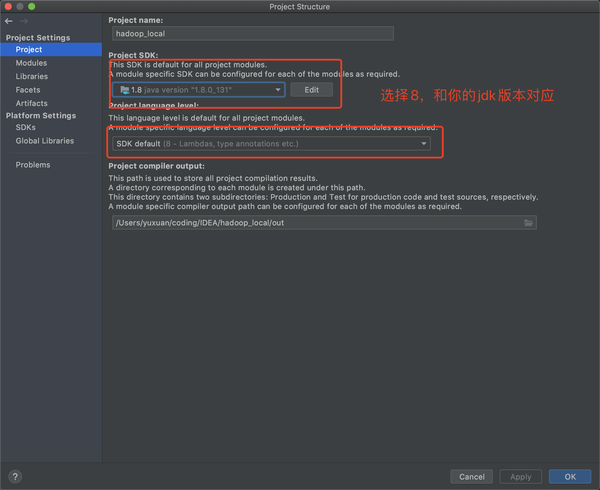
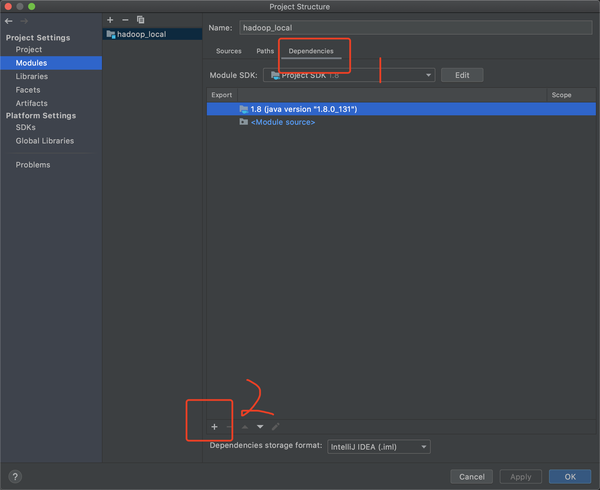
老样子进入project structure (File-Project Structure: 快捷键command+;)
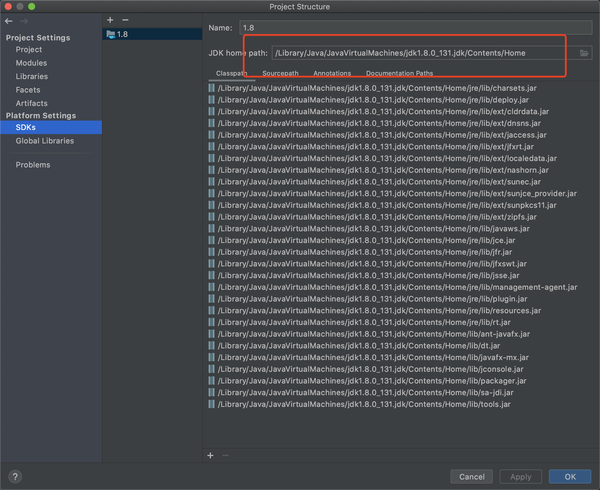
先检查SDK的情况,如果默认显示就是这样的,则就这样,如果不是添加(那个+号),路径基本上在mac上都差不多是这样的/Library/Java/JavaVirtualMachine/前应该都是一样的。
然后进入到Project的情况
然后进入到module,导入依赖(dependencies)
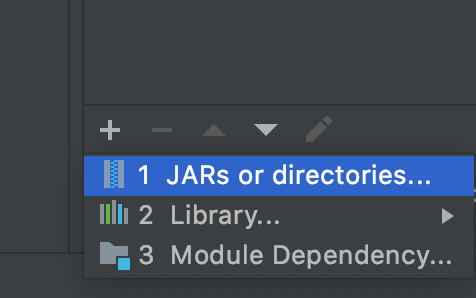
选择JARs or directories,按照下面操作多批次的导入解压后Hadoop的位置
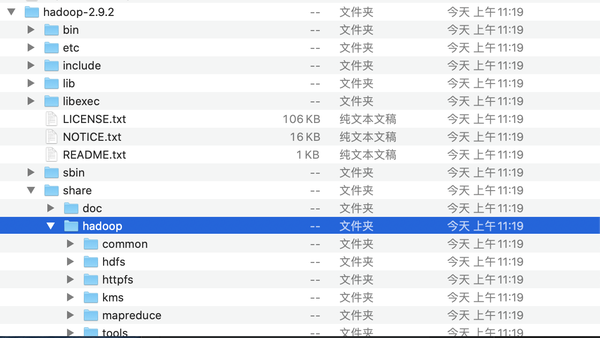
注意这儿Hadoop的位置是解压后的安装包在share->hadoop
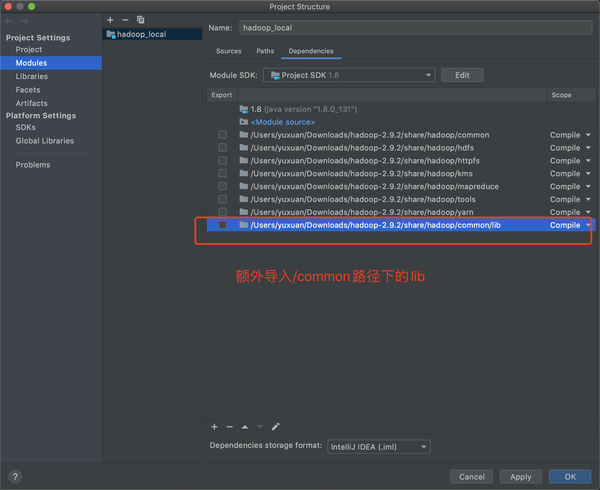
依次导入8个依赖,一个一个手动加,然后Apply,OK
编译和运行
运行如下WordCount.java
1
2
3
4
5
6
7
8
9
10
11
12
13
14
15
16
17
18
19
20
21
22
23
24
25
26
27
28
29
30
31
32
33
34
35
36
37
38
39
40
41
42
43
44
45
46
47
48
49
50
51
52
53
54
55
56
57
58
59
60
61
| import java.io.IOException;
import java.util.StringTokenizer;
import org.apache.hadoop.conf.Configuration;
import org.apache.hadoop.fs.Path;
import org.apache.hadoop.io.IntWritable;
import org.apache.hadoop.io.Text;
import org.apache.hadoop.mapreduce.Job;
import org.apache.hadoop.mapreduce.Mapper;
import org.apache.hadoop.mapreduce.Reducer;
import org.apache.hadoop.mapreduce.lib.input.FileInputFormat;
import org.apache.hadoop.mapreduce.lib.output.FileOutputFormat;
public class WordCount {
public static class TokenizerMapper
extends Mapper<Object, Text, Text, IntWritable>{
private final static IntWritable one = new IntWritable(1);
private Text word = new Text();
public void map(Object key, Text value, Context context
) throws IOException, InterruptedException {
StringTokenizer itr = new StringTokenizer(value.toString());
while (itr.hasMoreTokens()) {
word.set(itr.nextToken());
context.write(word, one);
}
}
}
public static class IntSumReducer
extends Reducer<Text,IntWritable,Text,IntWritable> {
private IntWritable result = new IntWritable();
public void reduce(Text key, Iterable<IntWritable> values,
Context context
) throws IOException, InterruptedException {
int sum = 0;
for (IntWritable val : values) {
sum += val.get();
}
result.set(sum);
context.write(key, result);
}
}
public static void main(String[] args) throws Exception {
Configuration conf = new Configuration();
Job job = Job.getInstance(conf, "word count");
job.setJarByClass(WordCount.class);
job.setMapperClass(TokenizerMapper.class);
job.setCombinerClass(IntSumReducer.class);
job.setReducerClass(IntSumReducer.class);
job.setOutputKeyClass(Text.class);
job.setOutputValueClass(IntWritable.class);
FileInputFormat.addInputPath(job, new Path(args[0]));
FileOutputFormat.setOutputPath(job, new Path(args[1]));
System.exit(job.waitForCompletion(true) ? 0 : 1);
}
}
|
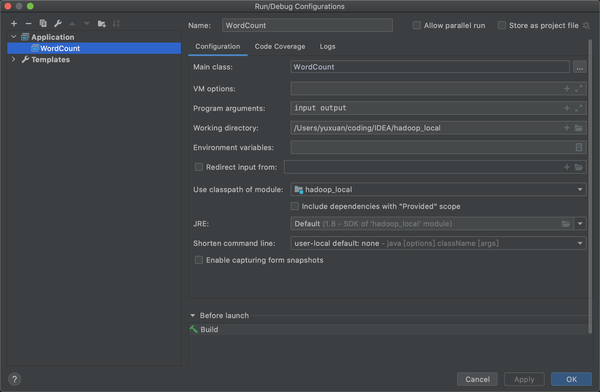
选择application后需要配置如下,name随意,最重要的是Main class: 保证名字和你new的java文件名字一致,input和output是等会要放入的文件,输入和输出
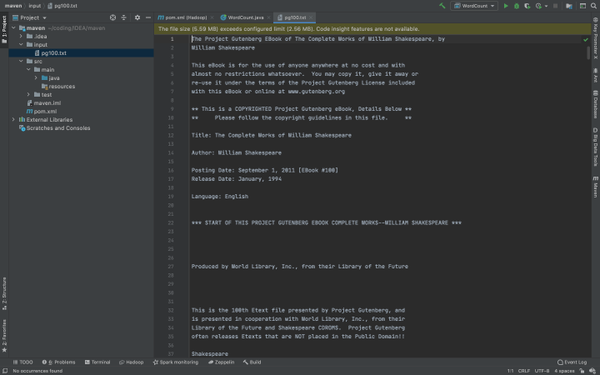
配置输入文件
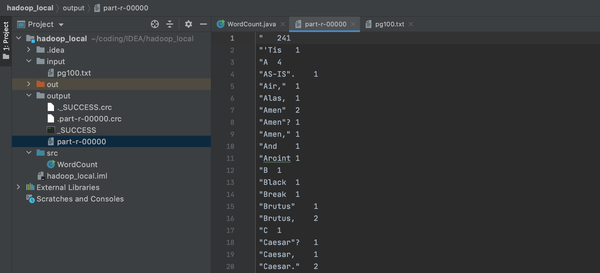
这里我刚刚在configuration里面写了我的输入文件叫input,需要配置输入路径,这里在(src同级目录下)新建一个文件夹input,并且把你需要输入的文件放进去,这儿还是之前的pg100.txt
运行

出现如下情况
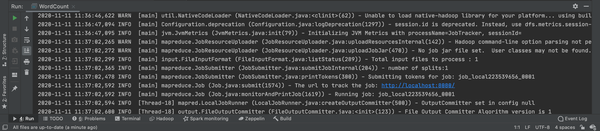
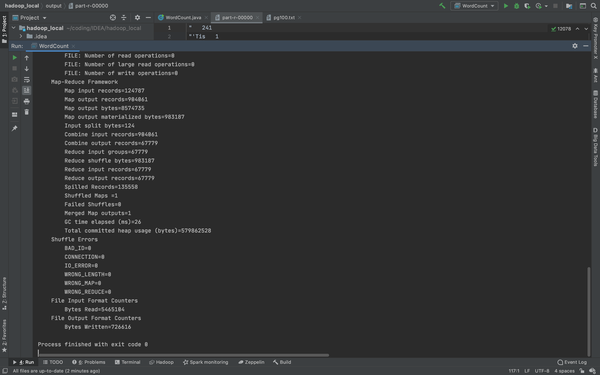
和之前在terminal里运行成功的一模一样,成功后会出现一个 output的文件夹,由于output的先天特性,它无法覆盖,所以下次运行的时候请删除之前的那个,或者你改个名字(我后来好像看见这个可以用其他方法覆盖的,这里就不做涉及)
到现在位置,Hadoop的教程都已经结束,无论是阿里云Hadoop的配置,运行WordCount.java还是mac本地的Hadoop运行调试,还是借助IDEA直接单机模式运行,都已经完成了。如果有不明白的,请关注我的专栏,里面有详细的步骤。